As new technology comes in the market, more detailed and refined requirements are given from the costumers, besides the competition that scales up the level of the results. Every single service now has it’s online version, like finding a place to live, someone to hire, someone to date, healthcare, shopping and an endless list. Therefore, more and more people are searching for those kinds of services, due to be easier and very straightforward.
So, the search word comes here with an emphasis, because the key and goal here is to make the user experience as easier as possible, when searching for those services. From IT perspective, the old known applications should fetch HTTP requests to a backend to query for results, when users search in your frontend. There isn’t any problem with that depending the context, but imagine you have a platform where users can search for listings, with a bunch of filters, imagine every single change in a filter sending a request to the backend. This may overload your server, also considering that you have scalability enough to maintain this configuration, the requests will definitely take more time than a text search engine.
Even before introducing ElasticSearch, let’s have a comparison here among two different configurations of the listing platform, describing it in a flow:
- User changes a filter -> request to the backend -> backend searches in database -> backend sends back the response.
- User changes a filter -> GraphQL query / Request to Text Search Engine / Response to frontend .
Between those two options, which one you think it would take less time to query information, with a better performance? The Text search engine would take less time, and I’m not saying that starting from today, we have to rip out backend and databases from our architecture, but we can use a text engine together with that.
For example, we can have our backend and a SQL database, to persist the important info of the application, and we would sync the information between our database and the search engine, and the search engine would be responsible for querying almost of the information to the users. This is how many applications like Airbnb, Booking works.
What is ElasticSearch
Elasticsearch is a distributed, open source search and analytics engine for all types of data, including textual, numerical, geospatial, structured, and unstructured. Elasticsearch is built on Apache Lucene, and can query data in a faster way.
Basically, we can say that ElasticSearch operates roughly like a NoSQL database, storing JSON in collections, and performs queries to retrieve this data with many available querying methods, allowing the user to do aggregations, transformations that from a SQL perspective, or even code, would extremely difficult, and less effective.
Back to the Hybrid infrastructure with database, imagine that you have an application to search for supermarkets prices. All of the prices are stored in the database, then you have a ElasticSearch cluster that syncs the information in realtime with your DB. Now, your frontend /backend it’s ready to query data directly from the cluster.
What is Kibana
Kibana is a free and open user interface that lets you visualize your Elasticsearch data and navigate the Elastic Stack. Do anything from tracking query load to understanding the way requests flow through your apps.
Summarizing, it’s a graphical interface, where you can visualize the data from ElasticSearch, create dashboards, analysis, and execute queries.
What we are going to do Today?
Today we will create a simple application where users can query all the different countries in the world, and get information about them. We will build a frontend in React, that will use the library ReactiveSearch, to connect with ElasticSearch, and get the data.
For running ElasticSearch and Kibana, we will be using Docker, because it’s TREND, and it’s easier to run in whatever OS you have. Don’t worry if you don’t know that, it’s a new opportunity to learn, and I will send all the needed commands as well, so let’s go directly into that.
Setting Up Docker Containers for ElasticSearch and Kibana
In order to deploy the containers, we will use Docker-Compose, a docker tool used to spin up multiple containers defined in a single yaml file. The good thing here, is that we only a single file, we will create the two needed containers. So, first of all create a file named docker-compose.yml in any directory that you want, and them paste the following content.
# ./docker-compose.yml

version: '3'

services:
  elasticsearch:
    image: docker.elastic.co/elasticsearch/elasticsearch:6.3.2
    environment:
      - cluster.name=docker-cluster
      - bootstrap.memory_lock=true
      - "ES_JAVA_OPTS=-Xms512m -Xmx512m"
    ulimits:
      memlock:
        soft: -1
        hard: -1
    ports:
      - "9200:9200"
  kibana:
    image: docker.elastic.co/kibana/kibana:6.3.2
    ports:
      - "5601:5601"
As we can see in the content of the file, we will have two services, the elasticsearch and kibana, and you could have asked, why docker-compose ? Because Docker containers, have BRIDGE, HOST, NONE network configurations, if you use docker-compose, it will automatically create a network that the containers can communicate with each other, and as the default configuration of the two containers are bridge, we can access them from host used the mapped ports.
So, having this file, in the same directory where this file is, run the following command to start the containers.
docker-compose up -d
This will start the containers in detached mode (parallel computer thread).
Massive! Now we have a development environment with ElasticSearch and Kibana, I can access both of them on your browser.
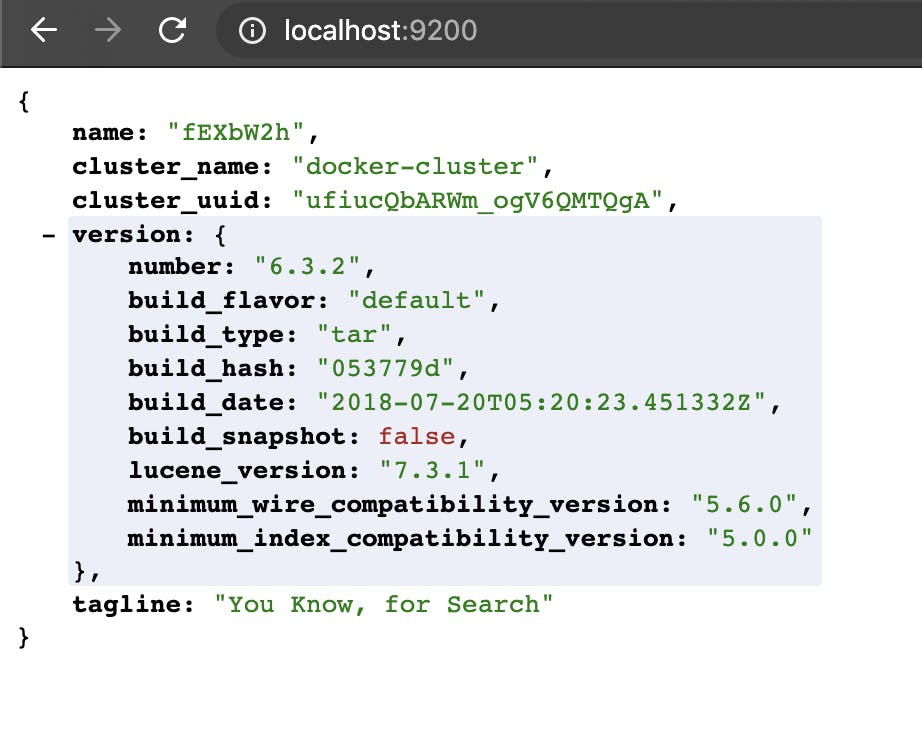
Test ElasticSearch accessing localhost:9200.
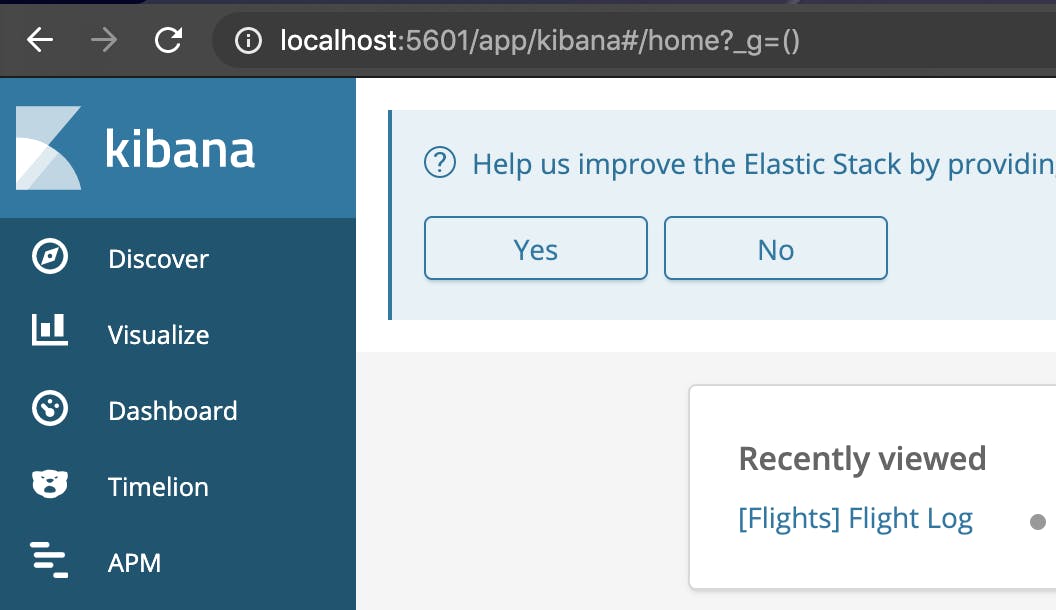
Test Kibana accessing localhost:5601
Now that we have our containers up and running, we need to insert some data in ElasticSearch, just download this file, that contains a set of countries and save in a directory of your choice.
showerio-public.s3.amazonaws.com/countries...
After saving it, you can do an HTTP request to the ElasticSearch container to add all the content of that file. So, do the following command, where you saved the file:
curl -H 'Content-Type: application/x-ndjson' -XPOST 'localhost:9200/countries/doc/_bulk?pretty' --data-binary @countries.txt
After that, you should have all the data saved into ElasticSearch, and now let’s query this data using Kibana.
Query Data in ElasticSearch, from Kibana
In order to query data in Kibana, proceed to that on your browser (localhost:5601) and in the sidebar, go to Dev Tools.
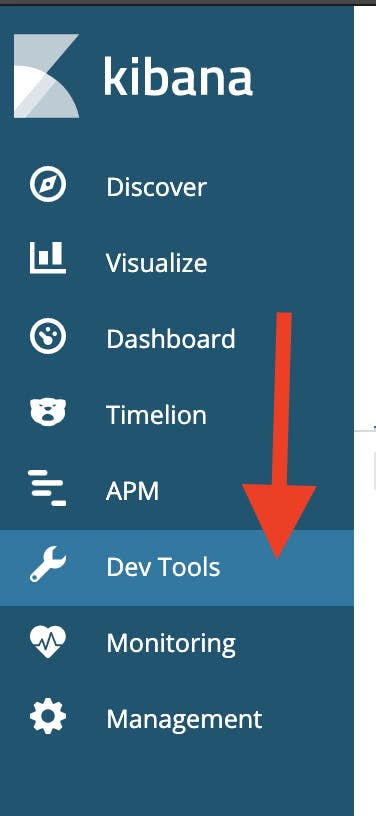
Type the following in the console:
GET countries/_search
You would be able to check all the available data from all the countries around the world.
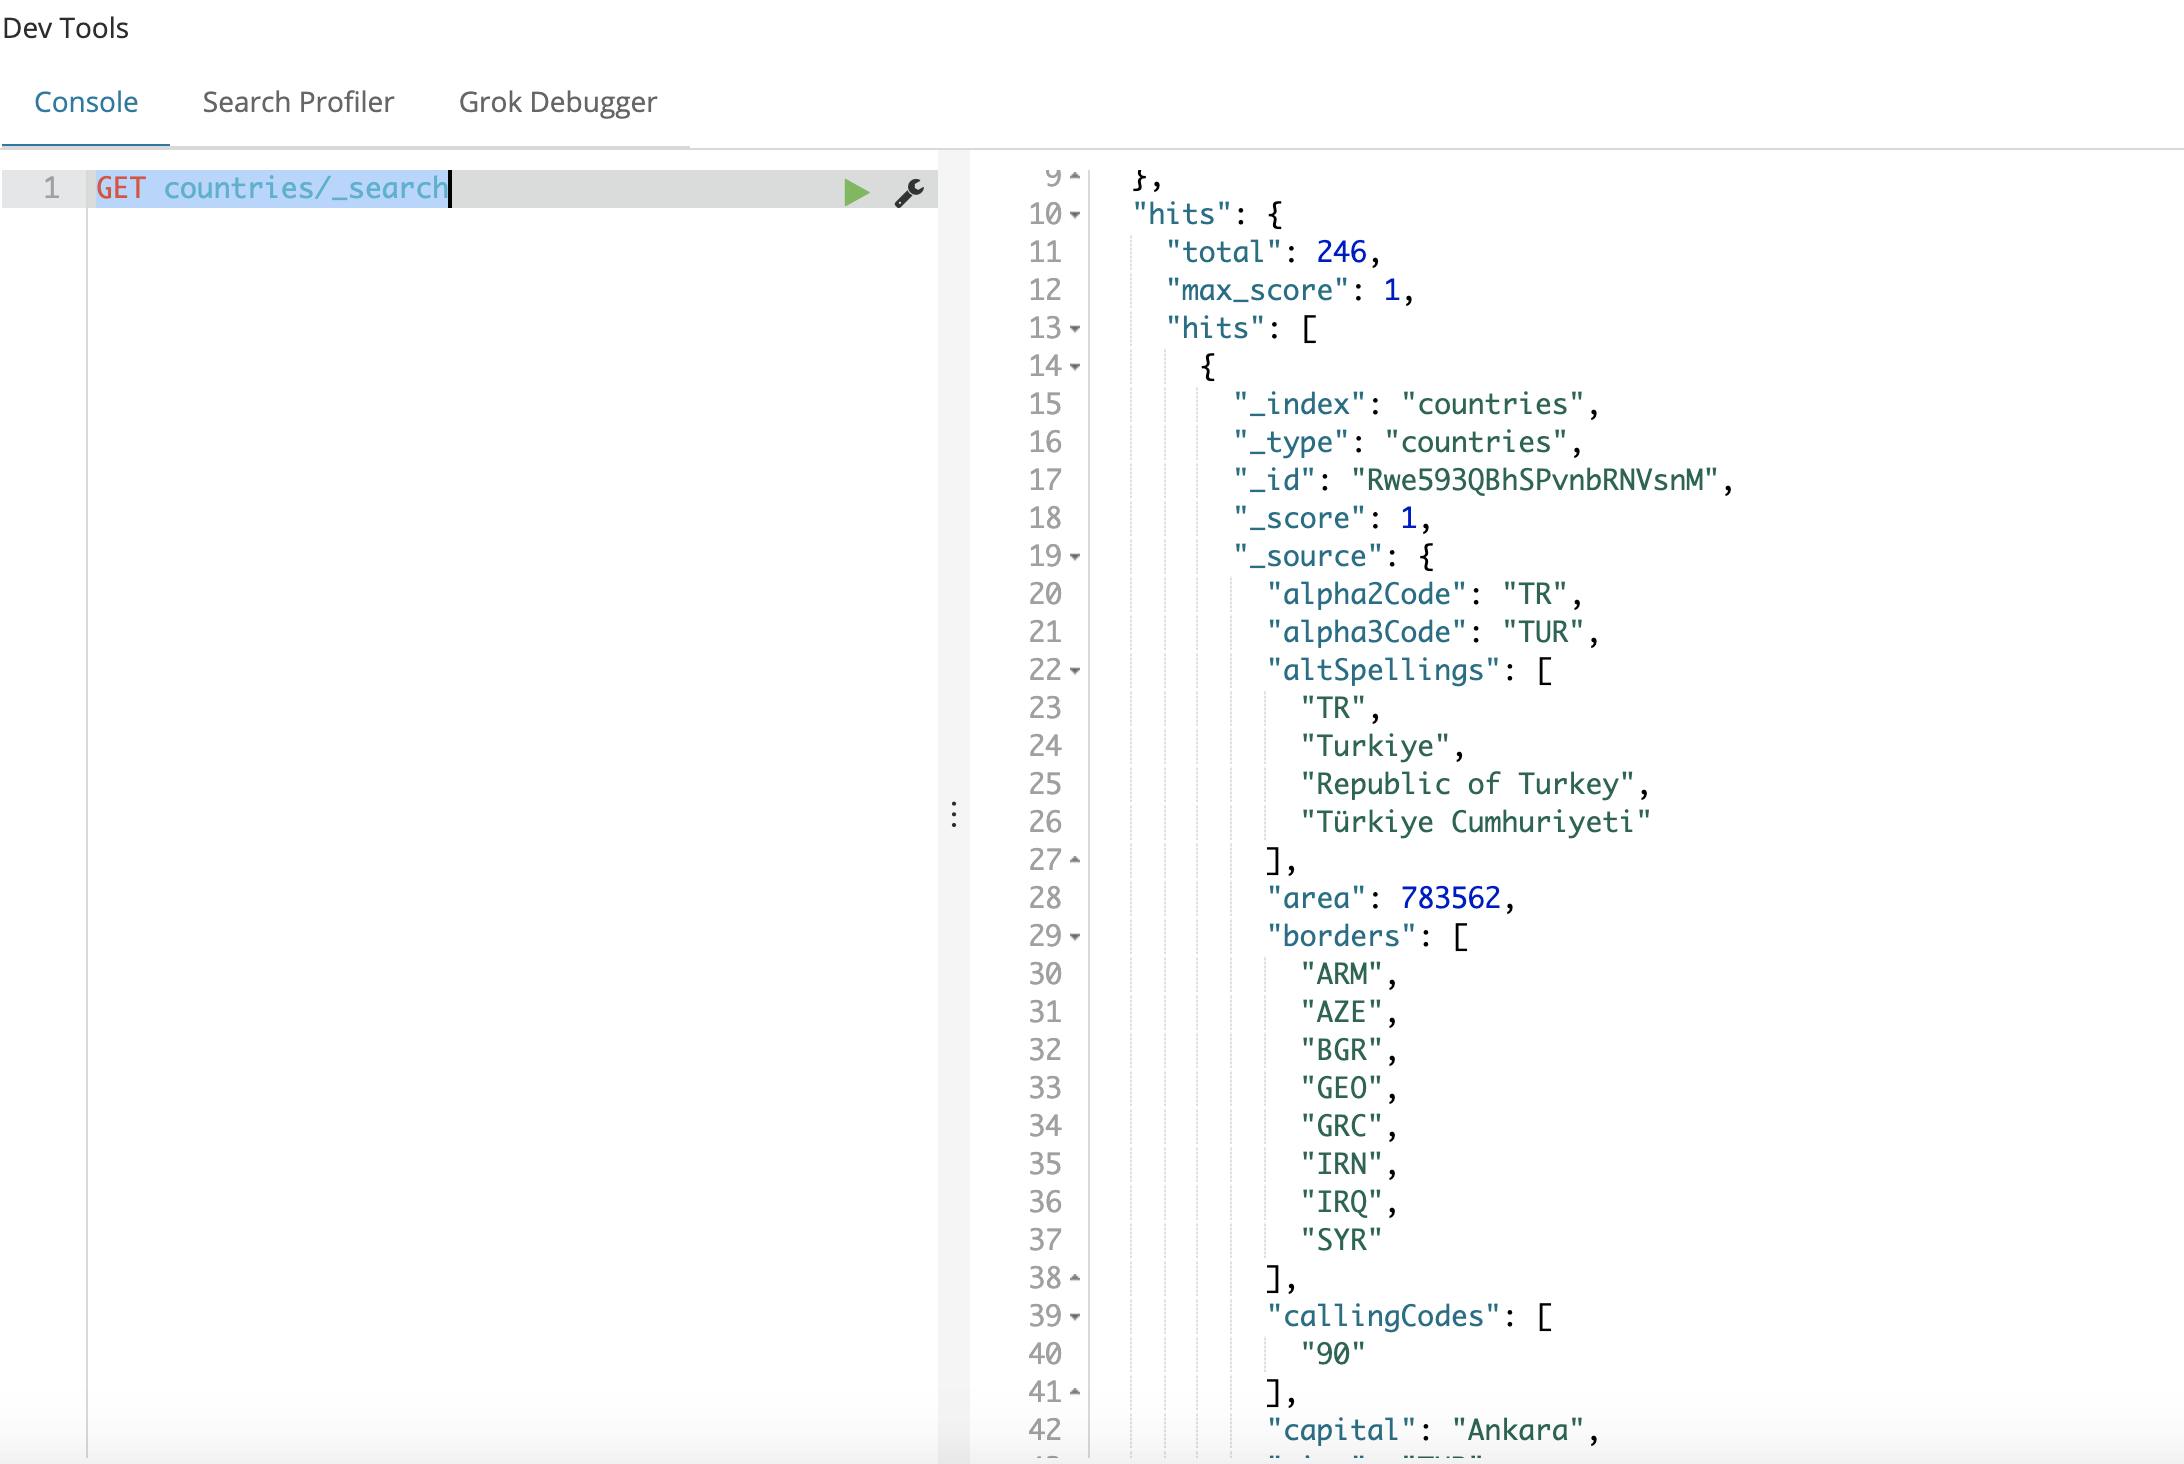
There are several parameters that we can use to query the data, for sake of simplicity we aren’t going to dive on that today. Now that we have everything set up on ElasticSearch side, let’s go to the frontend.
Creating the React App
All let’s create the React App, that will have a very simple UI, that will use the library ReactiveSearch, a library used to make an abstraction between querying data with React in ElasticSearch, it focuses in delivering a better user experience, making the developers focusing on that task, rather than spending a lot of time creating the query part, or GraphQl. Also, the good part is that those components are widely customizable, which means that this library can attend from the most simple requirements, to the more detailed ones.
Don’t worry also if you don’t know React, we will pass all the commands for you to run it properly.
So, in a directory of your choice, having NPM and create-react-app npm package installed on your machine. If you don’t have it, install it by:
npm install -g create-react-app
After that you can start a new react project, with the command:
create-react-app my-awesome-search && cd my-awesome-search
Finally, install the ReactiveSearch package:
npm install @appbaseio/reactivesearch
Now, we are ready to go to our React app code. Into the src folder, open App.js file, and edit, pasting the following content.
import React, { Component } from "react";
import {
  ReactiveBase,
} from "@appbaseio/reactivesearch";
import "./App.css";
import SingleList from "@appbaseio/reactivesearch/lib/components/list/SingleList";
import ReactiveList from "@appbaseio/reactivesearch/lib/components/result/ReactiveList";
import ResultList from "@appbaseio/reactivesearch/lib/components/result/ResultList";


class App extends Component {
  render() {
    return (
        <div className="main-container">
          <ReactiveBase
              app="countries"
              url="http://localhost:9200"
              theme={{
                colors: {
                  primaryColor: "#41ABF5"
                }
              }}
          >
            <div className="filters-search-container">
              <div className="search-container">
                <SingleList
                    size={300}
                    componentId="CountrySensor"
                    dataField="region.keyword"
                    title="Countries"
                />
              </div>
            </div>

            <div className="result-map-container">
              <ReactiveList
                  componentId="SearchResult"
                  dataField="name"
                  pagination
                  size={10}
                  react={{
                    and: ['CountrySensor'],
                  }}
                  render={({ data }) => (
                      <ReactiveList.ResultListWrapper>
                        {data.map(item => (
                            <ResultList key={item._id}>
                              <ResultList.Image src={item.flag} />
                              <ResultList.Content>
                                <ResultList.Title>
                                  <div
                                      className="book-title"
                                      dangerouslySetInnerHTML={{
                                        __html: item.name,
                                      }}
                                  />
                                </ResultList.Title>
                                <ResultList.Description>
                                  <div className="flex column justify-space-between">
                                    <div>
                                      <div>
                                        Native Name: {' '}
                                        <span className="authors-list">
                                             {item.nativeName}
                                          </span>
                                      </div>
                                    </div>
                                    <div>
                                      <div>
                                        Capital:
                                        <span className="authors-list">
                                             {item.capital}
                                          </span>
                                      </div>
                                    </div>
                                    <span className="pub-year">
                                       Region {item.region}
                                            </span>
                                  </div>
                                </ResultList.Description>
                              </ResultList.Content>
                            </ResultList>
                        ))}
                      </ReactiveList.ResultListWrapper>
                  )}
              />
            </div>
          </ReactiveBase>
        </div>
    );
  }
}
export default App;
Explaining some points of this component, the first component into the render will be the ReactBase component, which is the main component to connect to your ElasticSearch.
         <ReactiveBase
              app="countries"
              url="http://localhost:9200"
              theme={{
                colors: {
                  primaryColor: "#41ABF5"
                }
              }}
          >
You just have to pass the url of ElasticSearch, as we are using a local docker container, it will be localhost:9200, and the name of the collection, which we named countries.
After that you can run the React app with:
npm run
You should see a page like this, on localhost:3000:
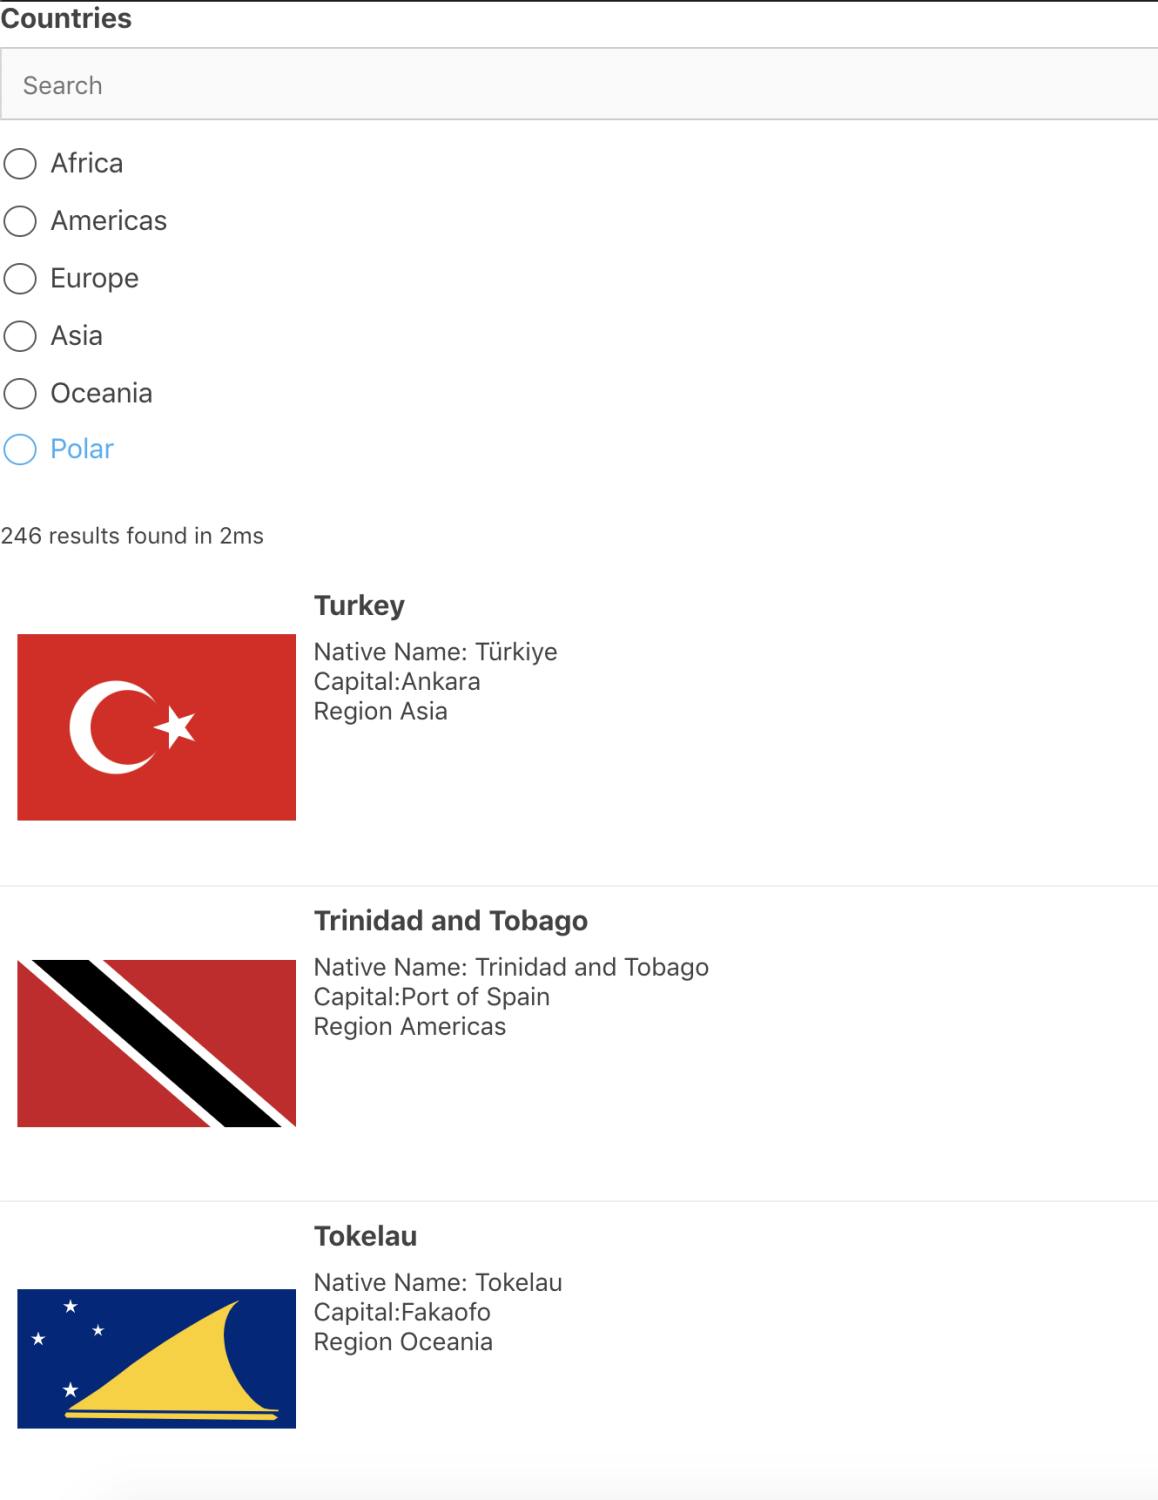
There is a SearchBox with the different continents, to filter the following countries, and the cool thing here is that ReactiveBase has a lot of different components to apply those filters, and as we can see, we only have to worry with the React side of things, and UI. I didn’t have to set up queries with ElasticSearch, which enhances the developer experience in delivering a better UI to the user.
As we can see, the changes using ElasticSearch make the UI sound more smoothly, and faster.
ElasticSearch came to make many changes and improve the way searching engines work, as new detailed requirements comes from users/costumer, systems need to grow and scale on that proportion, which is the performance increase that ElasticSearch delivery.
You can also take a look under my GitHub profile to discover more alternatives:

